
Ah, September, one of my favorite months of the year! As the leaves turn gold and your garden slows for the season, there’s a hidden opportunity waiting beneath your feet. Fall is the best time to dig into your soil’s condition, uncover its secrets, and prepare it for a thriving spring. Think of it as a lighthearted treasure hunt with a serious payoff: healthier soil, stronger plants, and a more productive garden next year.
Why Fall Is the Best Time to Test and Amend Soil
When plants start winding down, your soil is fully exposed and ready for attention. Adding amendments in autumn allows them to break down naturally over winter. Cooler weather makes soil work easier, and tests done now give you plenty of time to correct problems before planting season.
Master Gardener Tip – Fall is the best time to apply lime if your soil is acidic. It takes several months for pH to stabilize, so by spring your garden will be perfectly balanced.
How to Test Your Soil in Fall
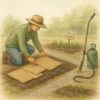
Step 1 – The Soil Squeeze Test
Grab a handful of moist soil and squeeze it out between your thumb and pointer finger:
- Crumbly = sandy soil
- Sticky = clay soil
- Softly holds together = loam, the gardener’s gold
Master Gardener Tip – Perform this test when the soil is slightly damp. Too dry or too wet can give misleading results. More on the Soil Ribbon or Squeeze Test.
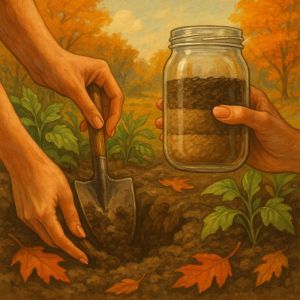
Step 2 – The Jar Test
The jar test is a simple, low-cost way to see exactly what your soil is made of.
- Collect your sample – Scoop soil from 3–5 spots in your garden (about 6 inches deep). Mix the samples in a clean bucket so you get a representative blend.
- Fill the jar – Add about 1 cup of your soil mixture to a clear glass jar. Fill with water until it’s two-thirds full.
- Shake it up – Put the lid on tight and shake hard for a full minute, breaking up clumps so every particle is suspended.
- Let it settle – Place the jar on a flat surface and wait. In a few minutes, the sand drops to the bottom. After a few hours, the silt forms a middle layer. Clay, being the finest particle, may take a day or more to fully settle on top.
What you’ll see is a natural “layer cake” of your soil’s texture:
- Sand – large particles, bottom layer, drains quickly.
- Silt – medium particles, middle band, retains some moisture.
- Clay – tiny particles, top layer, holds water tightly.
By comparing the thickness of each layer, you can estimate your soil type:
- Mostly sand at the bottom = sandy soil, drains fast but needs organic matter.
- Thick clay layer at the top = clay soil, holds water but compacts easily.
- Balanced layers = loam, the gardener’s ideal.
Master Gardener Tip – Mark the layers on your jar with a marker as they settle, then measure the depth of each band after 24–48 hours. This gives you a clearer picture of your soil’s makeup and helps guide your amendment choices.
(Visual: Diagram or photo of jar with labeled sand, silt, and clay layers.)
Step 3 – Check pH and Nutrients
Use a home test kit or send samples to your local extension service. This reveals pH (acidic or alkaline) and nutrient levels for nitrogen, phosphorus, and potassium.
Master Gardener Tip – Always take samples from multiple garden spots, mix them, and then test. A single “hotspot” can mislead you about your soil’s overall health.
Common Soil Issues You Might Uncover
- Compaction – Feels hard and dense, making it tough for roots to grow. Loosen with a garden fork.
- Low Nutrients – Pale leaves or stunted plants often point to nitrogen deficiency. Compost is your best fix.
- Poor Drainage – Standing water after rain shows clay-heavy soil that benefits from organic matter.
(Visual idea: infographic of soil types as “characters” — Sandy, Clay, Loam — for a touch of fun.)
Master Gardener Tip – Keep track of recurring soil problems in a garden journal. Over time, you’ll notice patterns that make future fixes faster and easier.
How to Fix Soil in Fall for a Strong Spring
- Compost – Add a layer of compost or aged manure to boost fertility.
- Cover Crops – Plant rye, clover, or vetch to enrich soil and prevent erosion.
- Mulch – Spread shredded leaves or straw to insulate beds and feed soil life over winter.
Master Gardener Tip – Shred leaves before applying as mulch. Whole leaves can mat down and block water or air, but shredded leaves break down beautifully into rich humus.
Bonus Fall Rituals for Gardeners
- Plant a Fall Promise – Garlic and bulbs thrive when planted now, setting the stage for spring blooms and harvest.
- Collect Leaves for Mulch – Turn fall cleanup into a resource hunt by gathering leaves to enrich your soil.
- Keep a Soil Journal – Record test results, amendments, and observations. In spring, you’ll see how your efforts transformed your garden’s foundation.
Master Gardener Tip – Retest your soil in spring and compare results with your fall notes. You’ll know exactly which amendments made the biggest impact.
Share Your Soil Discoveries
Did your soil reveal itself as sandy, clay-heavy, or loamy perfection? Share your fall soil findings and preparations on social media with the hashtag #FallSoilSecrets. Your experience may inspire other gardeners to take their soil health seriously.
Why This Matters
Healthy soil is the foundation of every great garden. By taking time in fall to test and amend, you’re setting up your garden for an abundant, vibrant spring. It’s not just a seasonal chore—it’s the smartest investment you can make for your plants.


More From Our Master Gardener


Unique Garden Tools

Shop Our Gardening Gift Boxes

5 Star Reviews for Our Hori Hori
Recent Posts


❄️ Snow as Fertilizer – The Truth About “Poor Man’s Nitrogen”
5 Unexpected Winter Weed Control Strategies (That Don’t Involve Mulch)

Harnessing Winter Sun – Passive Solar Tricks for Your Garden

How to Grow Spinach – The Ultimate Beginner’s Guide for Tender, Nutritious Leaves
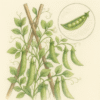
How to Grow Peas: The Ultimate Beginner’s Guide for Sweet, Crisp Harvests