There is something especially satisfying about creating a new plant from a simple cutting, especially when they’re your favorite plants. With hydrangeas, a healthy green stem can become a completely new shrub—and rooting it in water lets you watch the entire process unfold, and can be visually striking and a focus point for conversation.
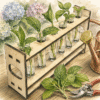
I recently made a simple maple wooden propagation station on my CNC designed to hold 1-inch glass test tubes. It combines two things I enjoy: making useful objects in the shop and experimenting with plants in the garden.
Before we go further, let me be honest about what this method is and is not. Hydrangeas are most reliably propagated in a moist growing medium, and most horticultural sources will point you there first. Water propagation is the visible method rather than the highest-percentage method. You will lose some cuttings. What you gain is the ability to monitor the stem, watch the first white roots emerge, and catch trouble before a cutting rots.
The process is simple, but the details matter.
When to Take Hydrangea Cuttings
The best material usually comes from the soft, flexible growth produced during the current season. In most of the country that means late spring through early summer. Here in the foothills of the Sierra Nevada mountains in California,the window opens earlier, and I am often taking cuttings while gardeners in colder zones are still waiting for their shrubs to push new growth.
Look for a stem that:
- Is green rather than old and woody
- Has several healthy sets of leaves
- Is free of insects and disease
- Has not produced a flower
- Is approximately 5 to 6 inches long
Nonflowering shoots are generally preferred because the cutting can direct its stored energy toward producing roots instead of supporting a bloom. University of Connecticut guidance recommends taking a 5- to 6-inch cutting from a shoot without a flower.
Bigleaf, panicle, and smooth hydrangeas all root readily from current-season softwood. Oakleaf hydrangeas are the stubborn ones—slower to root and stingier about it—so take extra cuttings if that is what you are working with.
Early morning is an excellent time to take cuttings because the plant’s tissues are usually well hydrated.
Did You Know?
Many of the hydrangeas sold today are patented cultivars. Endless Summer, the Let’s Dance series, and most other trademarked introductions carry a plant patent, and during the patent term it is illegal to propagate them for sale or to give the resulting plants away. Rooting a few for your own garden is fine. Selling them at a plant swap is not. Check the plastic tag that came with the shrub—if you see “PP” followed by a number, or the phrase “asexual propagation prohibited,” that plant is spoken for.
What You Will Need
For this method, you will need:
- A healthy hydrangea plant
- Clean, sharp pruning shears
- Glass test tubes or small narrow containers
- A propagation stand
- Clean, room-temperature water
- Small pots and potting mix for transplanting
- Optional plant labels
My propagator uses 1-inch test tubes held upright in a CNC-cut wooden stand. The narrow tubes support each stem while keeping the nodes visible below the waterline.
The individual tubes also make it easier to label different hydrangea varieties and remove one cutting without disturbing the others.
Step 1: Choose the Right Stem
Select a healthy nonflowering branch from the outside portion of the plant. Avoid weak, damaged, spotted, or heavily shaded growth.
Follow the stem down until you find at least two or three leaf nodes.
A node is the slightly swollen point where a pair of leaves grows from the stem. These nodes matter because the tissue near them can produce adventitious roots—new roots that form from something other than an existing root system. That is what allows a bare green stem, with no piece of the original roots attached, to become an entirely new shrub.
Make your initial cutting several inches below the tip.
Step 2: Prepare the Cutting
Bring the stem to your work area immediately. Hydrangea leaves can lose moisture quickly, so do not leave fresh cuttings sitting in direct sunlight.
Trim the stem to approximately 5 or 6 inches long, making the bottom cut just beneath a leaf node.
Remove the leaves from the lowest node. That bare node will eventually sit below the surface of the water.
Leave one or two sets of leaves at the top of the cutting. When the remaining leaves are especially large, cut each leaf approximately in half. Reducing the leaf surface lowers the amount of moisture the cutting loses while it is trying to form roots.
Do not strip every leaf from the stem. The cutting still needs some foliage to continue photosynthesis.
Step 3: Place the Cutting in the Test Tube
Fill each test tube with clean, room-temperature water.
Insert the hydrangea cutting so that at least one bare node is submerged. Keep all remaining leaves above the water.
Leaves left beneath the surface will quickly deteriorate. As they break down, they foul the water and encourage bacterial growth.
The narrow opening of a 1-inch test tube helps hold the cutting upright, but make sure the stem is not wedged tightly against the glass.
A Splash of Something Irish
I will confess to an unscientific habit. I sometimes add a small splash of Irish whiskey to the tube water, on the theory that it discourages bacteria in the water.
I have no data to support this. The concentration is almost certainly too low to do much of anything, and there is a fair argument that the sugars do more good for the bacteria than the alcohol does harm. But the tubes seem to stay clear, the cuttings do not seem to mind, and it amuses me. Consider it tradition rather than technique.
Clean water, changed regularly, is what actually does the work.
Step 4: Choose the Right Location
Place the propagation station in bright, indirect light.
Avoid a hot windowsill or any location receiving intense afternoon sun. Clear glass can warm quickly, and an unrooted cutting cannot replace lost moisture as efficiently as an established plant.
A location near an east-facing window or several feet back from a brighter window usually works well.
The cuttings should receive enough light to remain green and active without being heated or dried by direct sunlight.
Step 5: Keep the Water Clean
Check the water every day or two.
Top off the tubes as the water level falls, making sure the lower node remains submerged. Replace the water completely whenever it becomes cloudy, develops an odor, or begins collecting debris. Cloudy water almost always means plant tissue is breaking down somewhere in the tube, so wash the glass rather than simply topping it off.
Even when the water still looks clear, changing it approximately once a week helps keep the tubes clean.
When changing the water:
- Remove the cutting gently.
- Rinse the test tube.
- Refill it with room-temperature water.
- Return the cutting without rubbing or damaging the stem.
Avoid adding fertilizer during the early rooting stage. The cutting does not yet have a mature root system capable of using it effectively.
When Will Roots Appear?
Most softwood hydrangea cuttings in water show their first roots somewhere between two and four weeks. Some take six weeks or longer. Rooting time varies with the variety, temperature, age of the stem, light level, and condition of the cutting, so treat those numbers as a general expectation rather than a schedule.
Do not be discouraged when nothing appears during the first couple of weeks. The cutting is undergoing changes inside the submerged node before visible roots emerge.
You may first notice small pale bumps or raised areas along the node. Fine white roots should eventually extend from these points.
Allow the roots to develop rather than transplanting the moment the first tiny root appears. A cutting with several branching roots will generally handle the transition to potting mix better than one with a single fragile root.
Water roots can be delicate, so the next step should be handled carefully.
Moving a Water-Rooted Hydrangea into Soil
Although hydrangeas can begin rooting in water, they should not remain in the test tube permanently.
Once the cutting has developed a small network of roots, prepare a 4-inch nursery pot with a light, moist potting mix.
Master Gardener Tip
When you pot up a water-rooted cutting, use a mix with extra perlite. Roots formed in water are accustomed to constant moisture and unlimited oxygen, and a chunkier mix gets them closer to both while they adapt to living in soil.
Make a planting hole before removing the cutting from the tube. This prevents the tender roots from being bent or scraped as you push them into the soil.
Hold the cutting upright, spread the roots gently into the hole, and firm the potting mix around them. Water thoroughly to settle the soil.
For the first week or two:
- Keep the potting mix consistently moist
- Protect the plant from direct afternoon sun
- Maintain bright, indirect light
- Avoid heavy fertilizer
- Do not allow the new roots to dry out
The transition from water to soil is often the most vulnerable part of the process. Roots formed in water must adjust to pulling moisture from particles of soil rather than being continuously surrounded by water.
Gradually reduce watering frequency as the plant begins producing healthy new growth, but do not allow the young hydrangea to wilt severely.
Signs the Cutting Is Doing Well
A successful cutting should remain reasonably firm and green while roots develop.
Positive signs include:
- White or cream-colored roots
- New growth at the top of the cutting
- Leaves remaining upright
- A clean, firm stem
- Roots beginning to branch
A little temporary drooping does not necessarily mean the cutting has failed. However, a dark, soft, or foul-smelling stem usually indicates rot.
Common Problems
The Leaves Keep Wilting
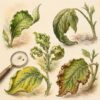
Large leaves lose moisture rapidly. Trim oversized leaves in half and move the propagator away from direct sun. If the leaf edges are browning rather than simply drooping, that is a different problem, and I covered it in
The Stem Is Turning Black
The submerged portion may be rotting. Replace the water, clean the tube, and inspect the stem. If the damage is limited, cut above the affected area and begin again with a clean node.
The Cutting Grows Leaves but No Roots
The top of the cutting can sometimes remain active using stored energy before a usable root system forms. Continue watching the submerged nodes rather than judging success only by the leaves.
Roots Form but the Cutting Dies After Potting
The plant may have been moved too quickly into dry soil or strong sunlight. Keep the potting mix evenly moist and maintain high humidity around the foliage during the transition.
Frequently Asked Questions
Can you really propagate hydrangeas in water?
Yes. Hydrangea cuttings will form roots in plain water. Success rates are generally lower than rooting in a moist growing medium, so take more cuttings than you need and expect to lose a few.
How long does it take for hydrangea cuttings to root in water?
Typically two to four weeks for the first visible roots, though six weeks or more is not unusual. Warmer temperatures and fresh softwood growth tend to speed things along.
Do I need rooting hormone?
Not for water propagation. Powdered rooting hormone is formulated to stay in contact with the stem in a solid medium, and it simply washes off in a tube of water. Save it for cuttings you plan to stick in soil or perlite.
What is the best time of year to take hydrangea cuttings?
Late spring through early summer, while the current season’s growth is still soft and flexible. In warmer regions that window arrives earlier; in colder zones it may not open until June.
Can I root a hydrangea stem from a cut flower arrangement?
Almost never. Florist stems are usually mature wood that has already flowered, they have been out of water during shipping, and they are frequently treated with floral preservatives. Take your cuttings from a living plant instead.
Is it legal to propagate my hydrangea?
For your own garden, yes. If the plant is a patented cultivar, propagating it for sale or distribution is not permitted while the patent is in force. Check the nursery tag for a patent number.
A Few Practical Tips
Take more cuttings than you think you need. Not every stem will root, even when it is prepared correctly.
Use separate test tubes rather than crowding several stems into one container. Individual tubes make it easier to track progress and reduce tangled roots.
Label the tubes when propagating multiple hydrangeas. It is surprisingly easy to forget which cutting came from which shrub.
Clean your pruning tools and propagation tubes before starting. Good sanitation is one of the simplest ways to reduce stem rot.
Most importantly, be patient. Plant propagation does not always happen on our preferred schedule.
Why I Like the Test-Tube Method
Rooting hydrangeas in a pot may be more traditional, but the test-tube method turns propagation into something visible.
You can see the submerged node change. You can watch the first root emerge. You can compare one cutting with another and learn which stems respond best.
The wooden CNC propagator also makes a functional display for a windowsill, potting bench, or garden workspace. The 1-inch tubes provide enough room for the stems and early roots while keeping each cutting separated and easy to inspect.
It is part propagation station, part garden experiment, and part handmade tool. I cut and finish each one here in the shop, and if you would like one for your own bench you shoot me a note.
In Closing: Growing a Garden from What You Already Have
Propagating hydrangeas reminds us that a garden does not always have to begin with another trip to the nursery.
Sometimes everything needed for a new plant is already growing in the garden.
Choose a healthy stem, make a clean cut beneath a node, remove the lower leaves, and place it in water. Then keep the water clean, protect the cutting from harsh sunlight, and give it time.
Eventually, those first fine white roots will appear against the glass.
And when they do, one small piece of a favorite hydrangea will be ready to begin a life of its own.

More From Our Master Gardener




Special Gifts for Gardeners
Shop Our Gardening Gift Boxes

5 Star Reviews for Our Hori Hori