A neglected garden bed can look overwhelming. Weeds have taken over, plants have disappeared beneath the growth, the soil has hardened, and it may be difficult to tell what is worth saving.
But an untidy bed is not necessarily a dead one.
Established perennials may still be alive below the surface. Dormant bulbs may be waiting for the right season. Volunteer seedlings may be hiding among the weeds. Even the soil can often be restored without digging everything out and starting over.
The key is to work in the right order — and at the right time of year. Fall and early spring are ideal for this kind of renovation. The soil is workable, weeds pull more easily, and transplants face far less stress than they would in the heat of summer. Here in the Sierra foothills, that window matters even more: our long, dry summers are hard on anything replanted late.
Step 1: Observe Before You Clear
Before pulling anything, spend a few minutes studying the bed.
Look for:
- Emerging shoots or buds
- Woody stems that are still flexible
- Plant labels or old irrigation lines
- Bulbs beginning to surface
- Desirable seedlings
- Areas where water collects
- Signs of animal activity or erosion
If you do not recognize a plant, photograph it and wait until you can identify it. Many useful perennials resemble weeds when they first emerge.
It also helps to observe the bed at different times of day. A space that appears shady in the morning may receive several hours of intense afternoon sun.
Step 2: Identify What Is Still Alive
Separate the plants into three groups:
- Keep: Healthy plants that are suitable for the location.
- Wait and see: Plants that are dormant, stressed, or difficult to identify.
- Remove: Dead, diseased, invasive, or badly misplaced plants.
For woody plants, gently scratch a very small section of bark with a fingernail. Green or moist tissue underneath indicates that the stem is still alive. Brown, dry tissue may be dead, but test farther down before removing the entire plant.
Perennials can be harder to judge. If the crown is firm and the roots are not black, hollow, or mushy, give the plant time to recover.
Avoid judging the whole garden by last season’s damaged foliage. The condition of new growth will tell you far more.
Step 3: Remove Weeds Carefully
Start with weeds that are flowering or forming seeds. Removing these first prevents another generation from spreading through the bed.
Pull weeds when the soil is slightly moist. Try to remove the entire root system, particularly with perennial weeds such as:
- Bindweed
- Bermuda grass
- Nutsedge
- Dandelion
- Oxalis
- Mallow
- Spotted spurge
- Foxtail
Use a hand fork to loosen the soil around deep or spreading roots. Aggressive digging or rototilling can chop underground stems into pieces and turn one weed into dozens.
Place weeds bearing seeds, persistent roots, or disease symptoms in the trash or green-waste bin rather than a cool home compost pile.
Step 4: Cut Back Dead and Damaged Growth
Once you can see the plants clearly, remove dead stems, broken branches, and diseased foliage.
Do not automatically cut every plant to the ground. Some shrubs flower on older wood, while ornamental grasses, seed heads, and hollow stems may provide habitat for beneficial insects.
Prune conservatively if you are unsure what a plant is or when it blooms. You can always remove more later.
Clean your pruners between plants when disease may be present.
Step 5: Check the Drainage
Before adding compost or installing new plants, find out how water moves through the bed.
After rain or irrigation, look for:
- Standing water
- Soggy areas that remain wet for several days
- Water running off rather than soaking in
- Cracked or crusted soil
- Exposed roots
- Eroded channels
- Extremely dry pockets beneath the surface
To perform a simple garden drainage check, dig a hole about 12 inches deep, fill it with water, and let it drain. Fill it again and observe how quickly the water level falls.
Very slow drainage may indicate compacted soil, heavy clay, a buried obstruction, or an unsuitable planting location. Extremely fast drainage may indicate sandy soil or a shortage of organic matter. Clay-heavy foothill soils tend toward the slow end, so do not be surprised if the second fill takes several hours to drain.
This is also the time to test any irrigation lines you found in Step 1. Run the system, look for leaks, clogged emitters, and dry zones, and repair or replace lines before they are buried under compost and mulch.
Do not amend only the planting hole with rich, fluffy material. This can create a pocket that holds water differently from the surrounding soil. Improve the bed more evenly whenever possible.
Step 6: Evaluate the Soil
You do not need perfect soil before you begin, but you should understand what you are working with.
Check:
- Moisture several inches below the surface
- Texture and compaction
- Earthworm and insect activity
- Root penetration
- Smell
- Organic matter
- Soil pH, if plants have struggled repeatedly
Healthy soil should smell earthy. A sour or swampy odor can indicate prolonged saturation and a lack of oxygen. If the drainage test in Step 5 was slow, this is where you will often find the reason — compaction and low organic matter usually go together.
A laboratory soil test is worthwhile if the bed has a history of poor growth, unexplained nutrient symptoms, excessive fertilizer use, or unknown fill soil. Avoid adding lime, sulfur, or large amounts of fertilizer until you know they are needed.
Did You Know
Many apparent nutrient deficiencies are actually root problems. Compacted, cold, saturated, or extremely dry soil can prevent a plant from absorbing nutrients that are already present.
Step 7: Restore the Soil Gently
In most established beds, you do not need to remove or replace all the soil.
Spread one to two inches of finished compost over the surface. Work it lightly into the uppermost layer only where the soil is bare and badly crusted. Around established plants, leave roots as undisturbed as possible.
If the soil is compacted, loosen small areas carefully with a garden fork without turning the entire bed upside down. Soil organisms, roots, moisture, and seasonal expansion will continue improving the structure over time.
Avoid adding sand to heavy clay unless you are following a properly calculated soil-amendment plan. Small amounts of sand mixed with clay can create an even denser, concrete-like texture.
Step 8: Divide and Reposition Survivors
Neglected plants are often unhealthy because they are crowded rather than because the soil is poor.
Divide mature perennials when appropriate, remove dead material from their centers, and replant the healthiest sections. Move plants that are receiving the wrong amount of sun or blocking smaller neighbors.
Preserve the best-established plants as the framework of the restored bed. This saves money and keeps the garden from looking newly planted and empty.
Step 9: Replant in Stages
Resist the temptation to fill every open space immediately.
First, choose plants suited to the bed’s actual conditions:
- Sun exposure
- Winter temperatures
- Summer heat
- Drainage
- Available irrigation
- Mature plant size
- Maintenance requirements
Place shrubs and structural plants first. Add medium-size perennials next, followed by groundcovers, bulbs, and seasonal color.
Leave enough room for each plant to reach its mature size. Crowding may create an instant effect, but it also reduces airflow and recreates the same problems you just corrected.
Step 10: Water Thoroughly
Deeply water the restored bed after planting. This settles the soil around the roots and reveals areas where water pools or runs away. If the bed is on drip irrigation, watch the first full cycle to confirm every plant is actually being reached.
During the first growing season, check moisture in the root zone rather than relying on the surface appearance. A bed can look dry on top while remaining wet below—or look damp after a light sprinkle while the roots are still dry.
Established survivors and new transplants may need different watering schedules. Treat them accordingly until the new plants develop larger root systems.
Step 11: Apply Mulch
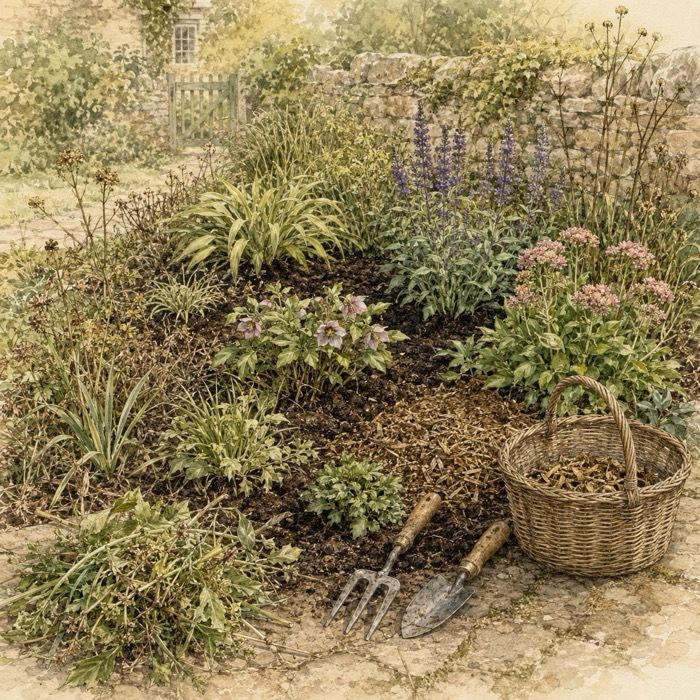
Finish with two to three inches of organic mulch, such as shredded bark, arborist wood chips, leaf mold, or composted leaves.
Mulch helps:
- Suppress new weeds
- Moderate soil temperature
- Reduce moisture loss
- Protect the soil surface
- Add organic matter as it decomposes
Keep mulch a few inches away from stems, trunks, and plant crowns. Mulch piled against living tissue can trap moisture and encourage rot, pests, and disease. Mulching tips here: See top mulching tips.
Master Gardener Tip
Place a few temporary markers beside plants you decide to keep. Once mulch is applied, small dormant perennials and bulbs can become nearly impossible to find—and surprisingly easy to dig up later.
Step 12: Watch the New Growth
A restored bed will not recover overnight. Some plants respond within days, while others may need an entire growing season.
Watch for:
- Healthy new leaves
- Firm, upright stems
- New buds
- Improved flowering
- Even moisture
- Fewer weeds
- Roots expanding beyond the original planting hole
Judge your work by the growth produced after conditions were corrected, not by last season’s scars.
Don’t Try to Fix Everything at Once
A neglected garden bed usually developed over months or years. It does not need to be rebuilt in a single weekend.
Work in sequence:
- Observe the bed.
- Identify the survivors.
- Remove weeds.
- Cut back dead and damaged growth.
- Check the drainage.
- Evaluate the soil.
- Restore the soil gently.
- Divide and reposition survivors.
- Replant in stages.
- Water thoroughly.
- Apply mulch.
- Watch the new growth.
This approach protects plants worth saving and helps you correct the underlying problems instead of simply covering them with new plants.
In Closing: Your Garden Is Talking to You
A neglected bed contains a record of what has happened there. The weeds reveal where soil remains bare. Moss and standing water point toward excess moisture. Stunted plants may indicate compaction, shade, crowding, or poor root health. The plants that survived show you which conditions the bed naturally supports.
Slow down and read those clues before you begin.
The goal is not to erase the old garden. It is to understand what remains, repair what is failing, and help the bed become healthy again.


More From Our Master Gardener





Special Gifts for Gardeners
Shop Our Gardening Gift Boxes

5 Star Reviews for Our Hori Hori

Recent Posts

How to Revive a Neglected Garden Bed: 12 Steps to Bring It Back

Curling Leaves: What Your Garden Is Trying to Tell You

Deadheading Guide: What to Deadhead & What to Leave Alone

Wood, Copper, or Stainless: The Best Garden Markers for Every Part of Your Garden

July Garden Signals: Yellow Leaves, Peony Aftercare & the Knee-High Rule